Comment programmer une future diffusion en direct sur YouTube ?

Live streaming has become one of the most powerful ways to connect with audiences in real time. Whether you’re hosting a gaming session, online class, product launch, webinar, or Q&A session, scheduling your live stream in advance can significantly increase attendance and engagement. When you schedule ahead of time on YouTube, your audience receives notifications, a public watch page is created, and you have time to promote the event properly.
Instead of going live instantly, planning your stream gives you a strategic advantage. You can design a custom thumbnail, optimize your title and description for search, share the link across social media, and even run reminder campaigns. In this guide, you’ll learn exactly how to schedule a future YouTube live stream step by step. As a bonus, we’ll also show you how to schedule a recording of your YouTube Live so you never miss important content.
1. How to Schedule a Future YouTube Live Stream?
Scheduling a live stream is simple once your channel is properly set up. Before starting, make sure:
- Your channel is verified
- Live streaming is enabled
- You have no live streaming restrictions
- First-time activation may take up to 24 hours
Now, let’s walk through the process.
Step 1: Go to YouTube Studio
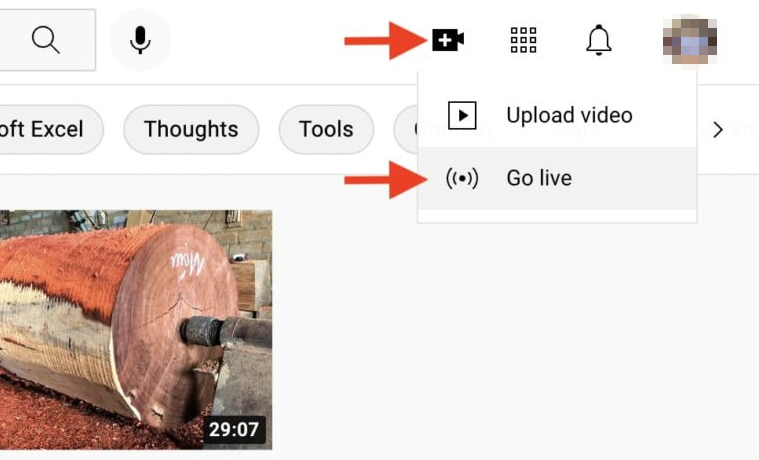
First, open YouTube Studio on desktop > Log into your YouTube account > Click the Create (+) button in the top-right corner > Select Go Live . This will open the Live Control Room.
Step 2: Create and Schedule a New Stream
Inside the Live Control Room:
- Cliquez Schedule Stream .
- Sélectionner Create New Stream .
- Enter your stream details.
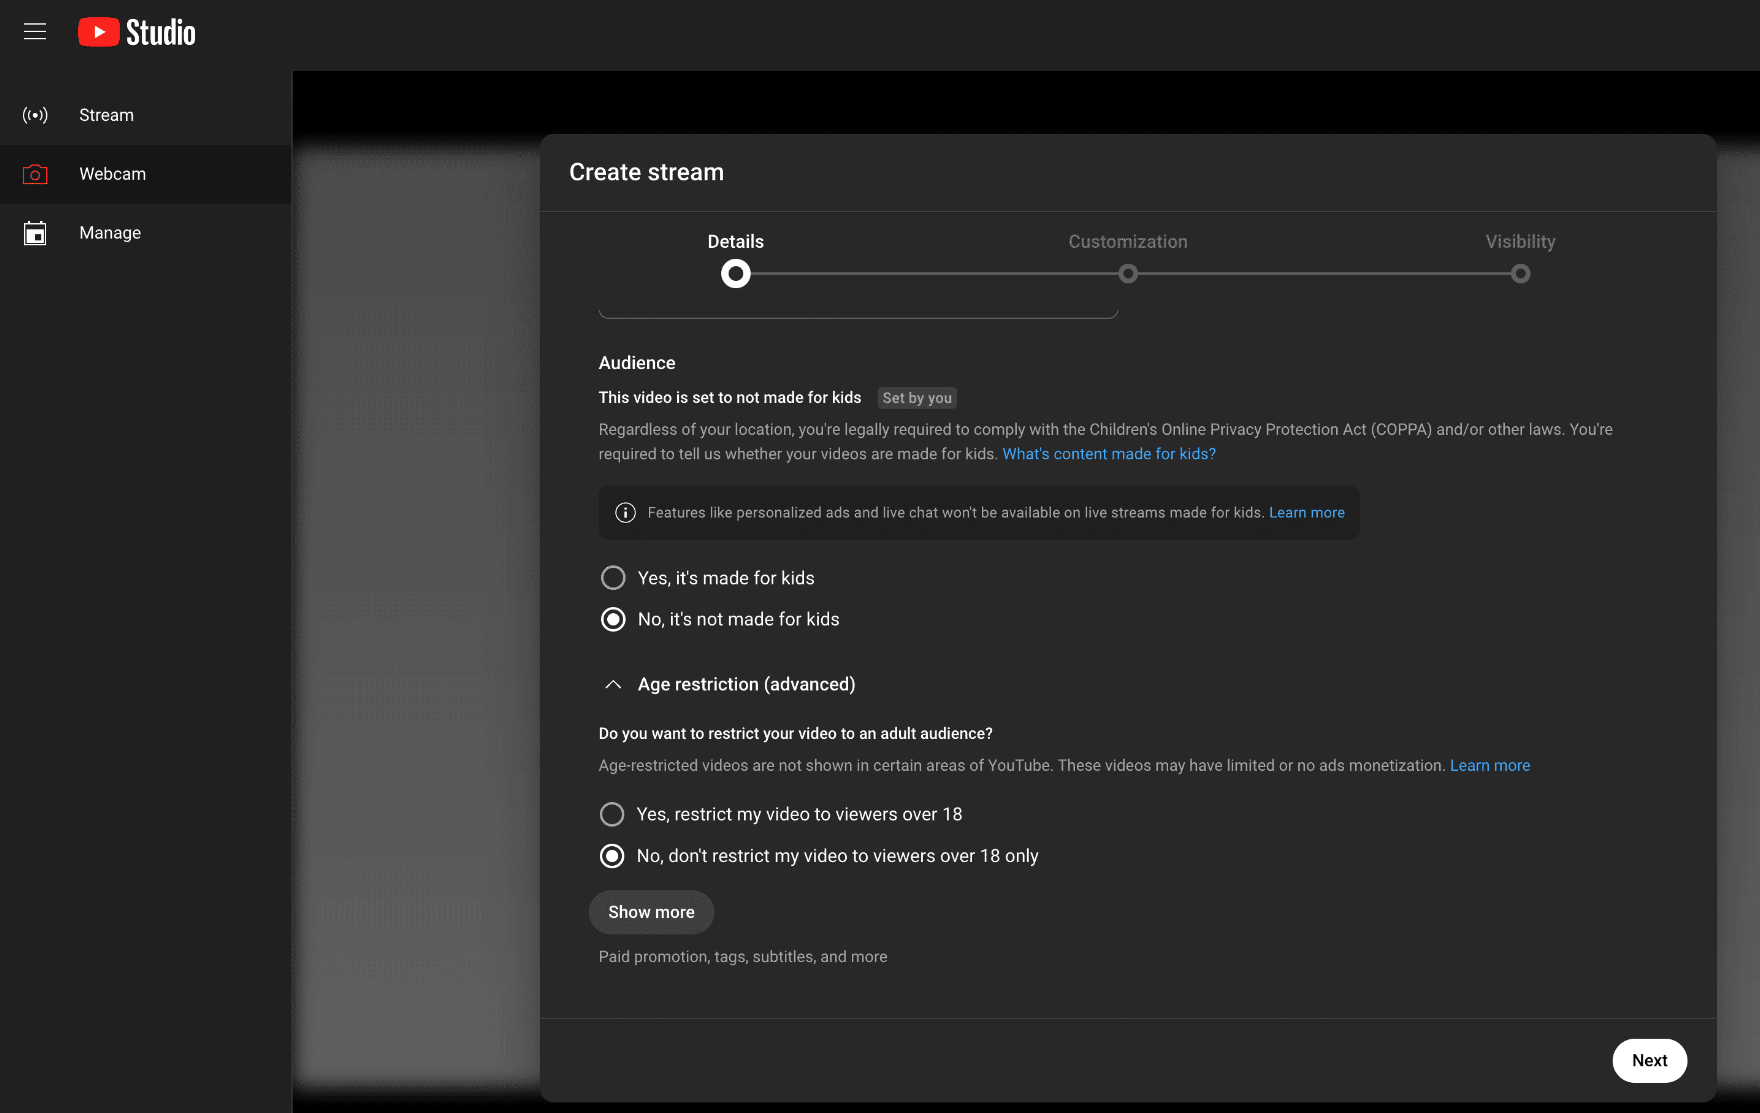
You’ll need to fill out:
- Title (use keywords for SEO)
- Description (explain what viewers will learn or experience)
- Thumbnail (custom thumbnails improve click-through rates)
- Audience setting (Made for kids or not)
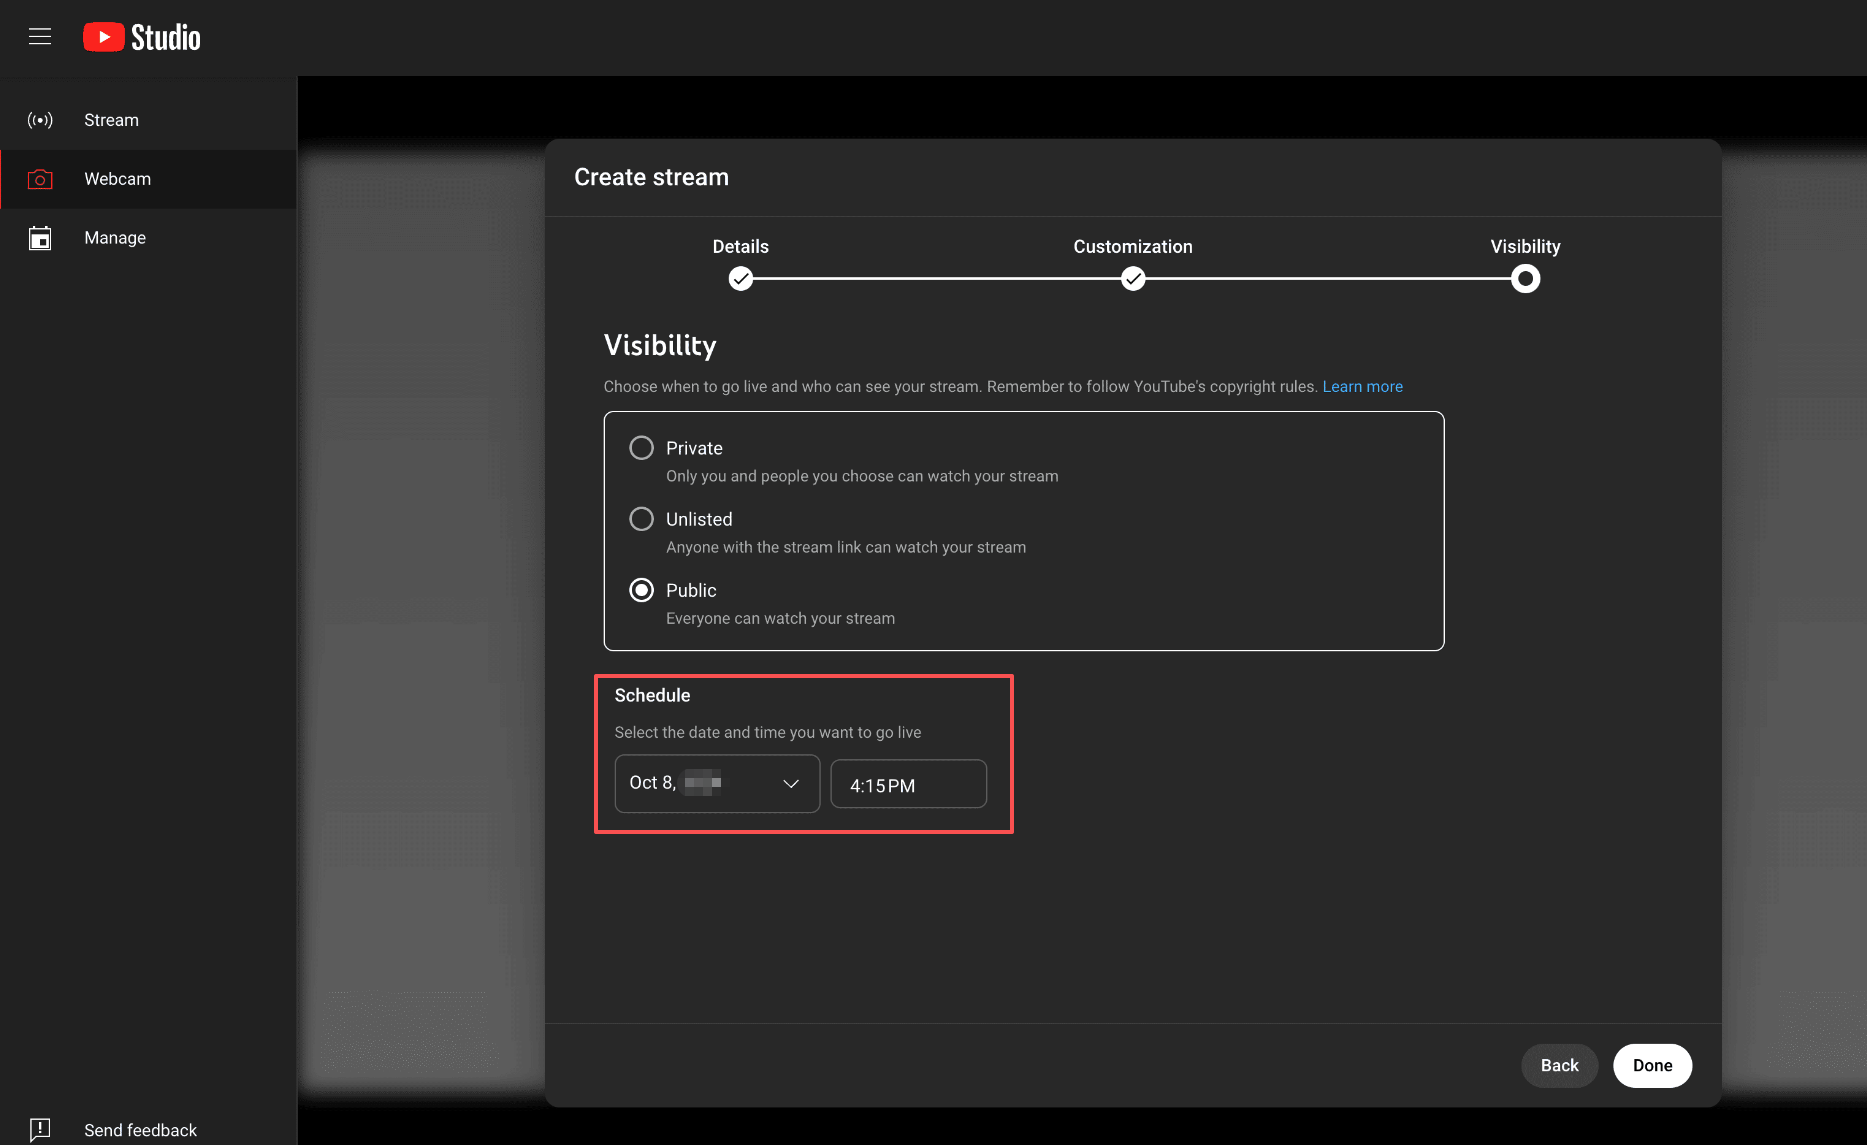
- Visibility (Public, Unlisted, or Private)
Next, choose your Date et l'heure , and confirm the correct Time Zone .
Cliquez Done ou Schedule , and your future live stream is officially created.
Step 3: Configure Stream Settings
Before finishing, review additional settings:
- Enable or disable Live Chat
- Allumer Monétisation
- Activer DVR (allows viewers to rewind during live stream)
- Choose stream latency (Normal, Low, Ultra-Low)
- Add age restrictions if necessary
These settings help customize viewer experience and performance quality.
Step 4: Share Your Scheduled Live Stream
Once scheduled, YouTube automatically creates a public watch page. This page includes a “Notify Me” button so subscribers can receive reminders.
To maximize attendance:
- Share the link on social media
- Post a Community update
- Add it to your email newsletter
- Embed it on your website
- Create short teaser clips
Scheduling at least 24–48 hours in advance gives your audience time to plan.
2. Scheduling a Live Stream with Streaming Software (OBS or Others)
If you’re using streaming software like:
- OBS Studio
- Streamlabs
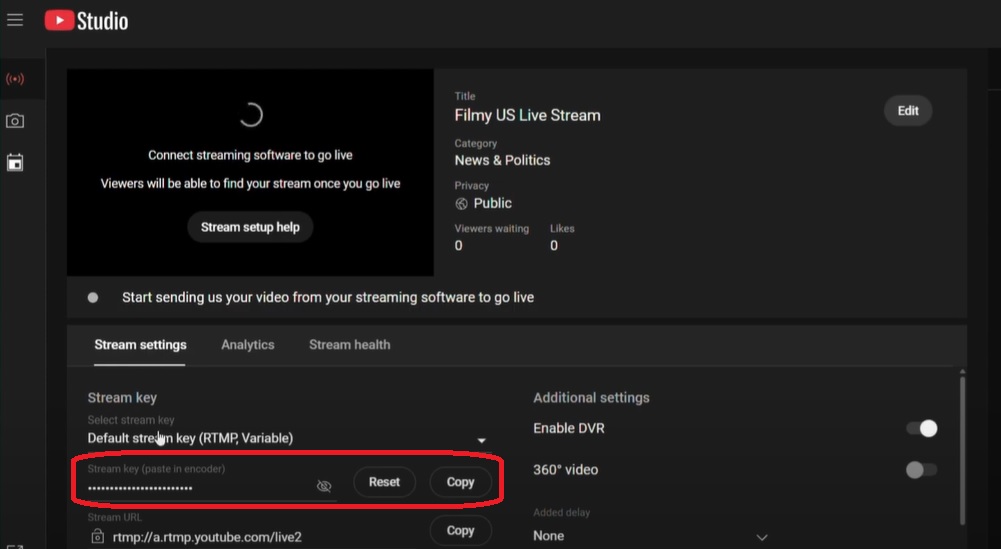
You should schedule the stream in YouTube Studio first, then:
- Copy your Stream Key from YouTube.
- Paste it into your streaming software settings.
- Start streaming at the scheduled time.
This method is ideal for gamers, professional streamers, and webinar hosts who need advanced layouts and overlays.
3. Bonus: Schedule Recording YouTube Live Stream with Swyshare Recordit
While YouTube automatically archives most live streams, there are situations where you may want a separate local recording:
- Backup copy for safety
- Higher-quality local version
- Recording someone else’s public live stream
- Extracting clips later
- Avoiding potential deletion
This is where Swyshare Recordit becomes extremely useful. Swyshare Recordit is a professional screen recording tool that allows you to:
- Record full-screen or selected areas
- Capture system audio, microphone and webcam
- Schedule automatic recordings
- Save videos in high quality and in popular format
- Edit video after recording and export instantly
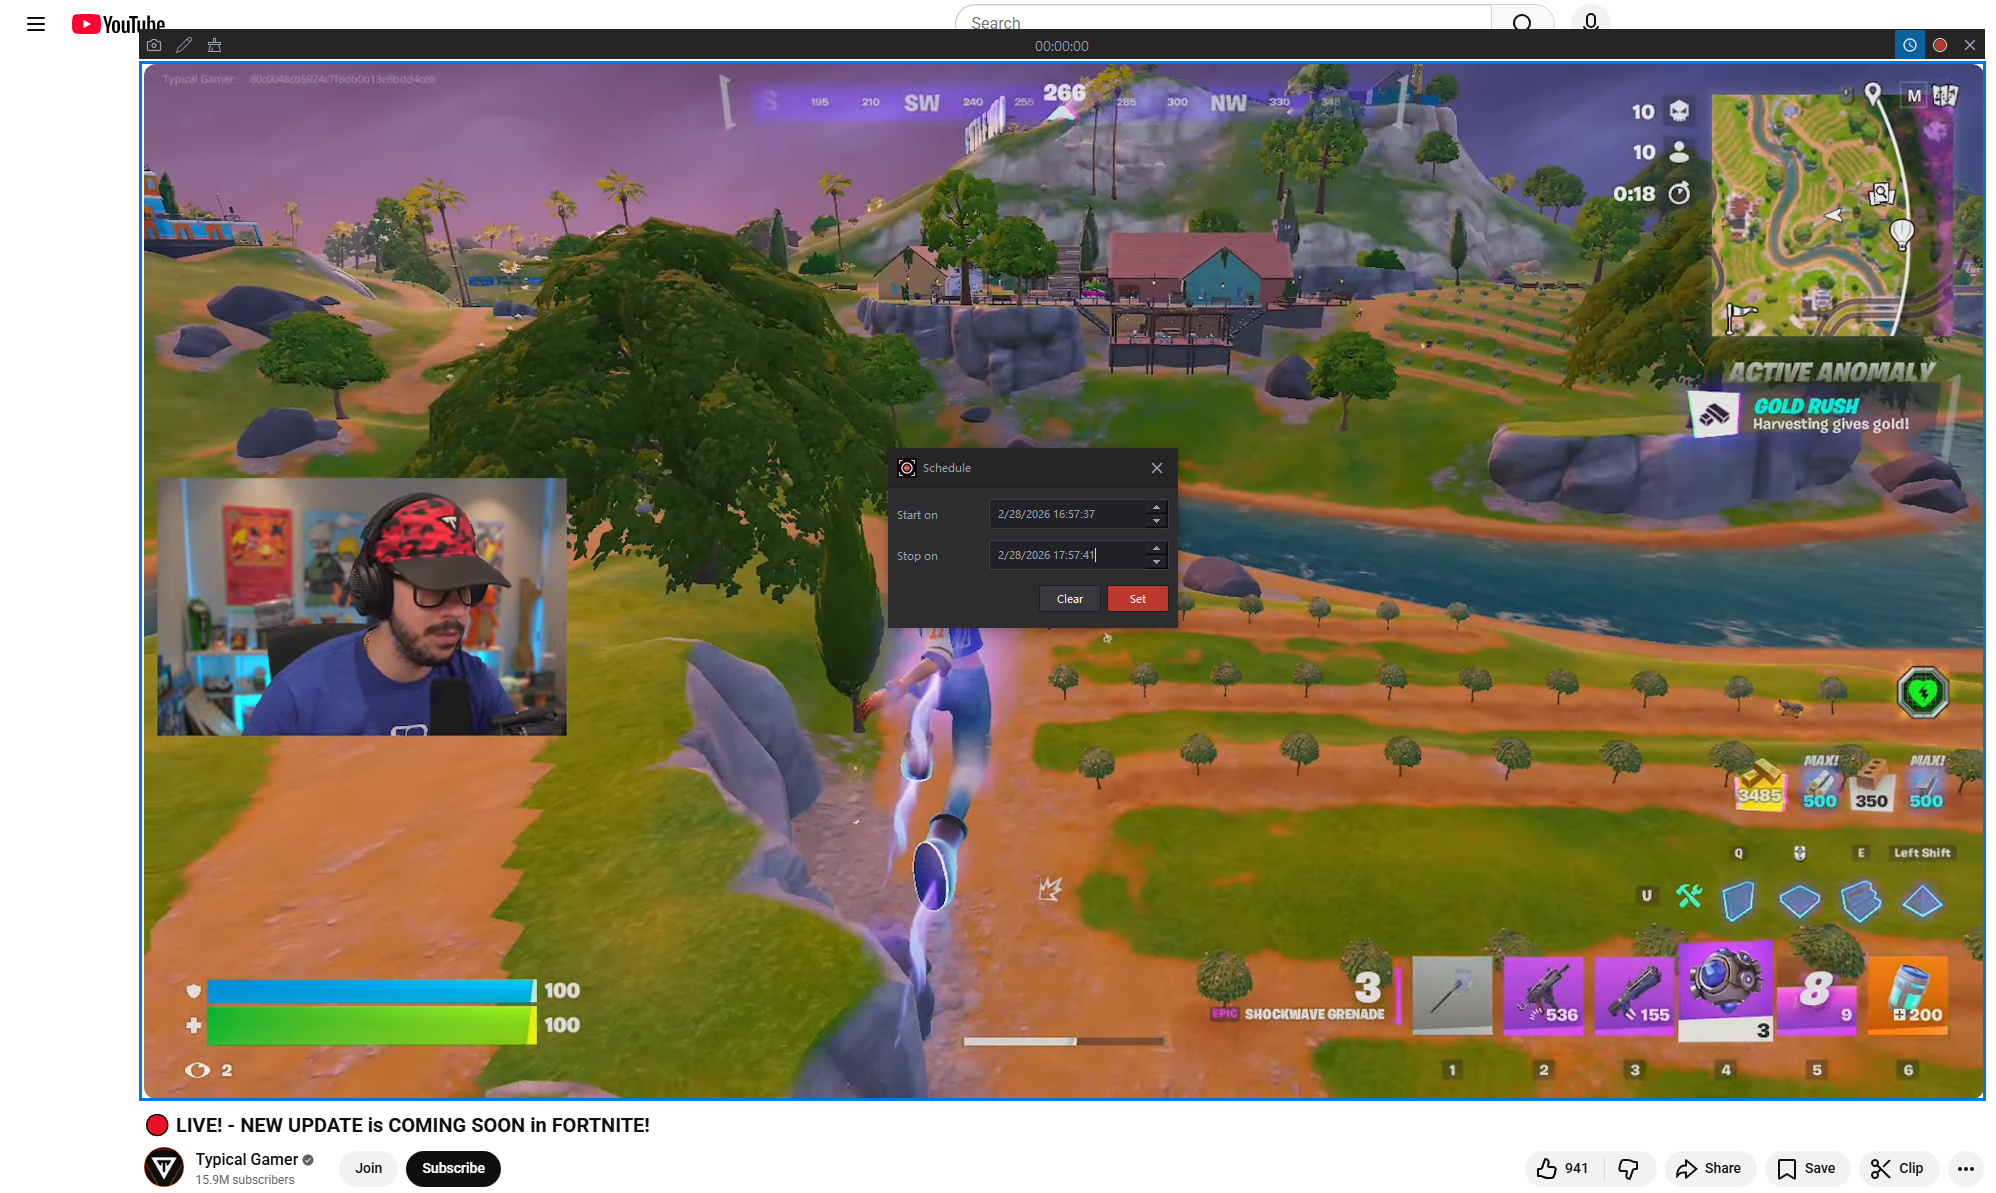
How to Schedule Recording a YouTube Live with Recordit :
- Download and launch Swyshare Recordit sur votre ordinateur.
- Choose to record full screen (recommended for live streams) and enable System Audio to capture live stream sound clearly.
- Use the built-in scheduler to set start and stop time. Once the scheduled time arrives, Recordit will begin capturing the live stream automatically.
- After the stream ends, your video file will be saved locally and ready for editing, uploading, or archiving.
4. Conclusion
Scheduling a future live stream on YouTube is one of the smartest ways to increase attendance, improve organization, and boost engagement. It allows you to promote your stream in advance, build anticipation, and ensure your audience shows up on time.
However, relying solely on YouTube’s automatic archive feature may not always be enough. For creators who want a secure backup, higher-quality local recordings, or automated capture without manual effort, Swyshare Recordit is a powerful solution.
By combining smart scheduling with automatic recording, you can run professional live events with confidence — knowing your content is safe, accessible, and ready to reuse anytime.
If you’re serious about live streaming, scheduling your event is step one — scheduling your recording with Recordit is the smart next step.